Setting Up To Use the Orderly API
Welcome to the Orderly API Hub! In this guide we'll show you how to get up and running with the Orderly APIs, from getting an account to making your first API calls.
Get An Account
If you don't have an account yet, request a demo account here. If you've already talked to an Orderly team member about setting up an account, check your email inbox for an invite.
Log in and get your API token
- Go to https://app.orderlyhealth.com
- Type in your username and password to log in
- Once you're logged in, navigate on the sidebar to "API tokens"
- Click on the "Add" button at the top right of your screen
- Type in a name for your token. This will be used to identify it later.
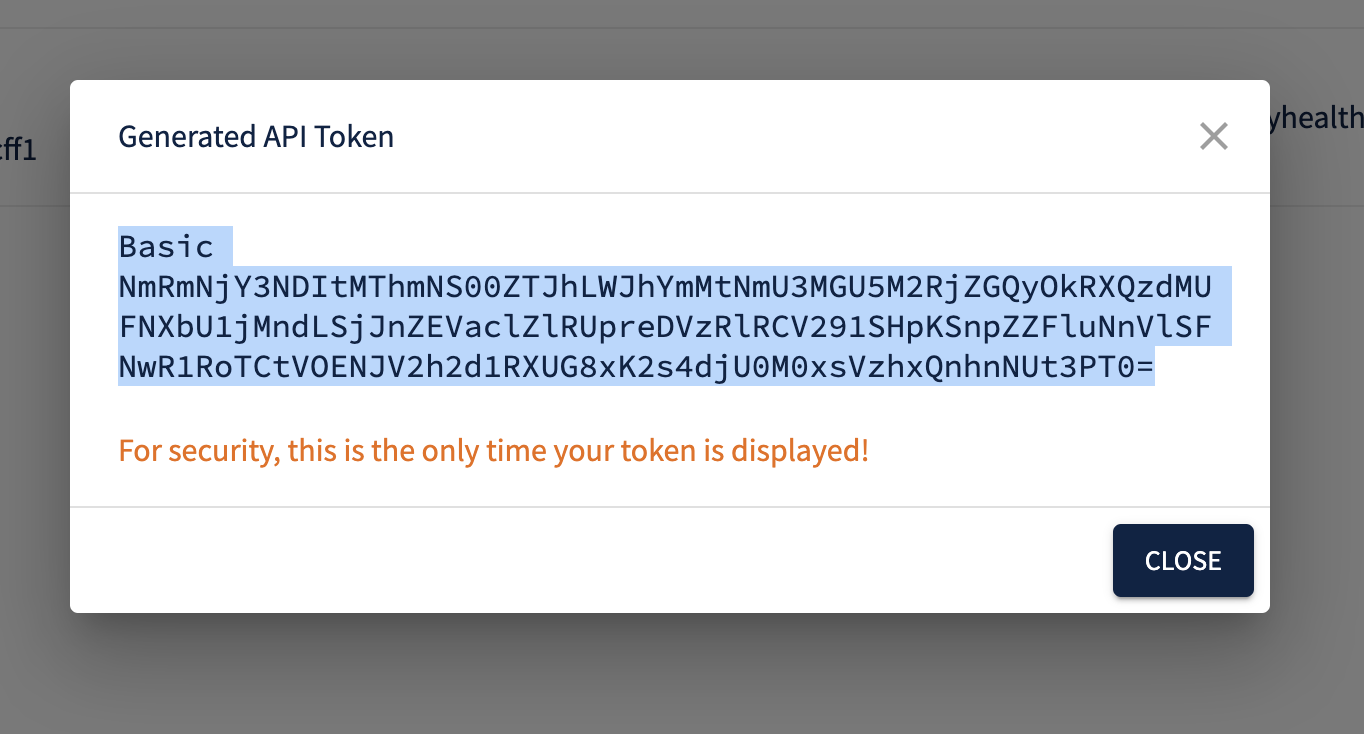
- You'll see your token show up as "Generated API Token". Copy this and save it someplace safe, such as your password manager. You will NOT be able to access it from the Web UI again later.

Bearer token in the Orderly portal
Orderly Health APIs allow you to use your API token over Basic Auth in the "Authorization" header. You can set the Authorization header directly in an API call using the "Encoded Authorization Header" section as: "{Your Encoded Authorization Header}" (note that the prefix "Basic" is already included). For making calls from the API documentation using "Try It!", scroll to the bottom of this guide.
Make an API request!
To make sure you have the Auth token working correctly, try the following CURL request from your command-line, substituting "{Your Encoded Authorization Header}" for the one you got above (note that "Basic" prefix should be included from what you copied in the token interface):
curl --request POST \
     --url https://api.orderlyhealth.com/json/api/read \
     --header 'Accept: application/json' \
     --header 'Authorization: {Your Encoded Authorization Header}' \
     --header 'Content-Type: application/json' \
     --data '{"npi":"1003045022"}'
If you get any kind of 4XX response, you're having an Authentication issue, and should reach out to Orderly for assistance. If you get a 200 response and some data returned, you're all set!
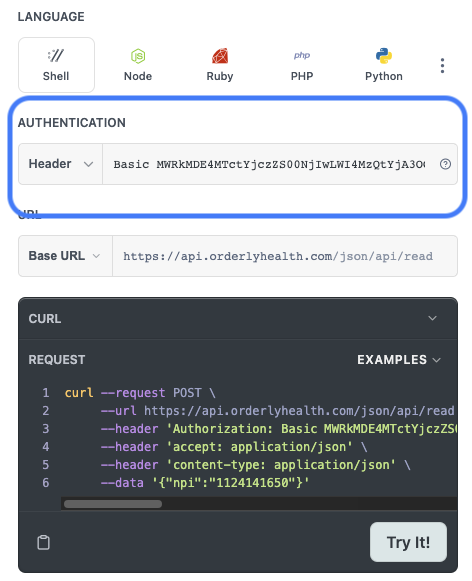
If you're using the "Try It!" feature of the API docs, then select "Header" as your Authentication type and paste in your token like shown below.

Authentication Inputs for "Try It!" feature
Updated 9 months ago
